Why Your Headshot Matters More Than You Think
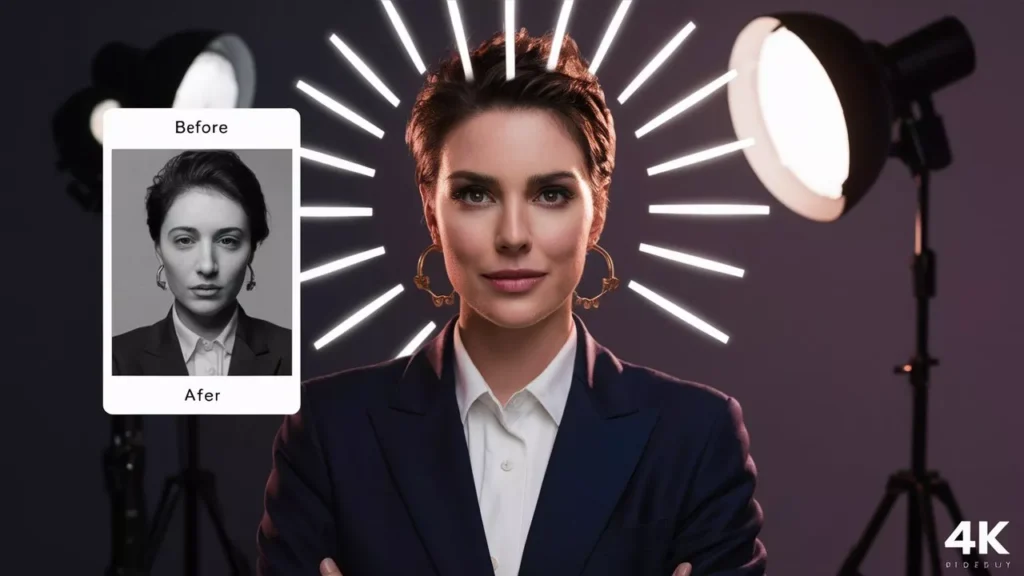
Imagine this: You’re scrolling through LinkedIn, looking at profiles. One person has a blurry selfie taken in bad lighting. Another has a professional-looking photo with perfect lighting and a clean background. Which one makes you want to connect or hire them?
Your headshot is often the first impression people get of you online. It’s your digital handshake, your virtual smile, and your professional identity all rolled into one photo. Whether you’re updating your LinkedIn profile, applying for jobs, building a business website, or creating a professional portfolio, having a great headshot can open doors.
But here’s the good news: You don’t need to spend hundreds of dollars on a professional photographer anymore. Thanks to artificial intelligence, you can now edit and enhance your headshots right from your phone or computer. Some AI tools can even create professional-looking headshots from your regular photos!
In this guide, we’ll explore the best AI tools for editing headshots, how they work, and which ones are perfect for your needs. Let’s dive in!
What Makes a Great Professional Headshot?
Before we talk about AI tools, let’s understand what makes a headshot “professional.” A great headshot should have:
Good Lighting: Your face should be well-lit without harsh shadows. Natural light works best, but AI can fix lighting issues too.
Clear Focus: Your face should be sharp and in focus, not blurry or pixelated.
Clean Background: A simple, uncluttered background that doesn’t distract from your face.
Professional Appearance: You should look approachable yet professional. Think “friendly colleague” not “party selfie.”
Proper Framing: Your head and shoulders should be in the frame, with your face taking up most of the photo.
Natural Expression: A genuine smile or confident expression that shows your personality.
Now that we know what we’re aiming for, let’s explore the AI tools that can help us achieve it!


The Top AI Tools for Editing Headshots
1. Remini – The Photo Enhancement Master
Remini is like magic for old or low-quality photos. If you have a photo that’s a bit blurry or pixelated, Remini can sharpen it up and make it look crystal clear.
What It Does Best:
- Fixes blurry and low-resolution photos
- Enhances facial details naturally
- Works on old photos too
- Super easy to use, even for beginners
Perfect For: Job seekers who only have older photos or selfies that aren’t super sharp.
How It Works: You simply upload your photo, and Remini’s AI analyzes it and enhances the details. Within seconds, you get a much clearer, sharper version of your photo.
Price: Free version available with limited enhancements. Premium version costs around ten dollars per month.
The Downside: The free version has watermarks and limits how many photos you can enhance. The AI sometimes makes faces look a bit too smooth or slightly different from the original.
2. Fotor – The All-in-One Editor
Fotor is like having a professional photo studio on your phone or computer. It’s packed with features but still really easy to use.
What It Does Best:
- One-click enhancements that work really well
- Background removal and replacement
- Skin smoothing and blemish removal
- Lighting adjustments
- Professional templates specifically for headshots
Perfect For: Professionals who want complete control over their photo editing but still want AI to do the heavy lifting.
How It Works: Fotor combines AI automation with manual controls. You can let the AI do everything automatically, or you can fine-tune specific aspects like brightness, contrast, and skin tone.
Price: Free version with basic features. Pro version starts at around eight dollars per month.
The Downside: Some advanced features are locked behind the premium subscription. The mobile app has fewer features than the desktop version.
3. ProfilePicture.AI – The Dedicated Headshot Creator
This tool is specifically designed for creating professional headshots from your casual photos. It’s relatively new but incredibly popular among LinkedIn users.
What It Does Best:
- Creates multiple professional headshot variations
- Uses AI to generate studio-quality photos
- Offers different styles (corporate, casual, creative)
- Changes backgrounds professionally
- Adjusts lighting to look studio-quality
Perfect For: Job seekers and professionals who want to create entirely new professional headshots without a photoshoot.
How It Works: You upload 10-20 photos of yourself from different angles. The AI learns what you look like and generates dozens of professional headshots in various styles and settings.
Price: One-time payment around thirty dollars for a set of headshots.
The Downside: You need to upload multiple photos for it to work well. Sometimes the AI-generated images can look slightly artificial if you look closely. It’s not for quick edits—you’ll wait a few hours for your photos.
4. PhotoRoom – The Background Removal Expert
PhotoRoom specializes in removing and replacing backgrounds. If you have a great photo of yourself but the background is messy or unprofessional, PhotoRoom is your best friend.
What It Does Best:
- Removes backgrounds instantly and accurately
- Adds professional backgrounds
- Works perfectly for product photos too
- Super fast processing
- Very accurate edge detection around hair and faces
Perfect For: Anyone who has a good photo but needs a cleaner, more professional background for LinkedIn or job applications.
How It Works: The AI identifies you in the photo and removes everything else. Then you can add a solid color, gradient, or professional background image.
Price: Free for basic use. Pro version is around ten dollars per month.
The Downside: The free version adds watermarks and limits resolution. Primarily focused on backgrounds, so you’ll need other tools for overall photo enhancement.
5. Luminar Neo – The Professional’s Choice
Luminar Neo is a more advanced photo editing software with powerful AI features. It’s for people who want professional-level results.
What It Does Best:
- Portrait enhancement with facial recognition
- Skin smoothing that looks natural
- Eye brightening and teeth whitening
- Advanced lighting adjustments
- Layer-based editing for precise control
Perfect For: Professionals who edit photos regularly or want the absolute best quality for important profiles like executive LinkedIn pages or company websites.
How It Works: Luminar Neo uses AI to identify faces and automatically suggest enhancements. You can accept these suggestions or adjust them manually for perfect results.
Price: Around fifteen dollars per month or a one-time purchase around eighty dollars.
The Downside: More complex than other tools, so there’s a learning curve. More expensive than simpler alternatives. Requires a decent computer to run smoothly.
6. Pixlr – The Free Powerhouse
Pixlr offers professional photo editing tools completely free in your web browser. It’s surprisingly powerful for a free tool.
What It Does Best:
- Completely browser-based (no download needed)
- AI-powered quick fixes
- Layered editing for advanced users
- Tons of filters and effects
- Works on any device with internet
Perfect For: Budget-conscious job seekers or students who need professional results without spending money.
How It Works: Open Pixlr in your browser, upload your photo, and use AI-powered one-click fixes or manual tools to enhance your headshot.
Price: Completely free with ads. Premium version around five dollars per month removes ads and adds features.
The Downside: The interface can be overwhelming with so many options. Ads in the free version can be annoying. Some features require a premium account.
7. StudioShot – The LinkedIn Specialist
StudioShot is specifically designed for creating LinkedIn profile photos. It understands exactly what makes a good professional headshot.
What It Does Best:
- Creates LinkedIn-optimized headshots
- Multiple style options (business formal, business casual, startup casual)
- Perfect sizing for LinkedIn profiles
- Professional backgrounds automatically
- Very fast processing
Perfect For: LinkedIn users who want to improve their profile photo quickly without any photo editing experience.
How It Works: Upload a few selfies or casual photos. StudioShot’s AI generates professional headshots that look like they were taken in a studio.
Price: Around twenty-five dollars for a package of headshots.
The Downside: Specifically designed for LinkedIn, so it might not be ideal for other uses. Limited customization options compared to general photo editors.
8. Facetune – The Selfie Enhancer
Originally designed for social media selfies, Facetune has evolved into a powerful tool for creating professional headshots.
What It Does Best:
- Very intuitive mobile interface
- Natural-looking skin smoothing
- Teeth whitening and eye brightening
- Reshaping features subtly
- Quick and easy to use on your phone
Perfect For: Job seekers who want to enhance a good selfie into a professional headshot quickly on their phone.
How It Works: Use your finger to retouch specific areas of your photo. The AI helps make adjustments look natural and prevents over-editing.
Price: Free version with basic features. VIP subscription around six dollars per month.
The Downside: It’s easy to over-edit and make photos look unrealistic. Primarily mobile-focused, with fewer features on desktop. Some features are locked behind the subscription.
9. Canva – The Design Platform with Photo Editing
While Canva is famous for graphic design, its photo editing features are excellent for headshots too.
What It Does Best:
- Background removal with one click
- Professional templates for headshots
- Easy adjustments for brightness, contrast, and saturation
- Can create matching designs for resumes and portfolios
- Very user-friendly interface
Perfect For: Job seekers who want to create an entire professional brand including resumes, portfolios, and headshots all in one place.
How It Works: Upload your photo to Canva, use the background remover tool, apply enhancements, and download. You can also use templates designed specifically for professional headshots.
Price: Free version is very capable. Pro version is around thirteen dollars per month.
The Downside: Not as specialized for faces as dedicated headshot tools. Background remover quality isn’t quite as good as PhotoRoom. More of a general design tool than a specific headshot editor.
10. PortraitPro – The Portrait Enhancement Specialist
PortraitPro is dedicated entirely to making portraits and headshots look their best. It’s been around for years and uses advanced AI.
What It Does Best:
- Extremely natural-looking enhancements
- Precise control over every facial feature
- Lighting that looks professionally done
- Skin texture that remains realistic
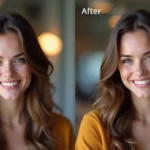
- Before/after slider to see changes
Perfect For: Professionals who want subtle, natural enhancements that don’t look edited.
How It Works: Upload your headshot, and PortraitPro’s AI maps your face. It then suggests enhancements that you can accept or adjust. You have control over everything from skin smoothing to eye color.
Price: One-time purchase around ninety dollars for the standard version.
The Downside: Desktop software only (not web-based). Higher upfront cost. Might be overkill if you only need to edit one or two photos.
How to Choose the Right AI Tool for Your Needs
With so many options, how do you pick the right one? Here’s a simple guide:
If you’re a job seeker on a budget: Start with Pixlr or Canva’s free version. Both offer powerful tools without spending money.
If you have a blurry or low-quality photo: Use Remini to enhance it first, then use another tool for additional edits.
If you need to create headshots from scratch: Try ProfilePicture.AI or StudioShot. They’ll generate professional photos from your casual selfies.
If you just need a better background: PhotoRoom is your best bet. It removes backgrounds accurately and quickly.
If you want professional-level control: Go with Luminar Neo or PortraitPro for the most advanced features.
If you want quick edits on your phone: Facetune or Remini’s mobile apps are perfect.
If you’re building an entire professional brand: Use Canva to create matching headshots, resumes, and portfolios.
Step-by-Step: Creating Your Perfect Headshot with AI
Let’s walk through creating a professional headshot using AI tools. We’ll use a combination approach for the best results.
Step 1: Choose Your Base Photo
Pick a photo where:
- You’re facing the camera directly or at a slight angle
- The lighting is decent (facing a window works great)
- You’re wearing professional clothing
- Your expression is natural and friendly
- The photo is as high resolution as possible
Step 2: Enhance the Quality (If Needed)
If your photo is a bit blurry or low resolution:
- Upload it to Remini
- Let the AI enhance it
- Download the improved version
Step 3: Remove or Replace the Background
For a clean, professional look:
- Upload your enhanced photo to PhotoRoom or Canva
- Remove the background with one click
- Add a solid color (gray, blue, or white work best for professional headshots)
- Or add a subtle professional background image
Step 4: Make Final Adjustments
Using Fotor, Pixlr, or another editing tool:
- Adjust the brightness so your face is well-lit
- Increase contrast slightly for a sharper look
- Use the skin smoothing tool gently (don’t overdo it!)
- Brighten your eyes slightly
- Adjust the saturation to make colors look natural
Step 5: Check the Results
Before finalizing:
- Zoom in to check for any weird artifacts or over-editing
- Make sure you still look like yourself
- Ask a friend for honest feedback
- Save it in high resolution (at least 1000 pixels wide)
Step 6: Optimize for Different Platforms
Different platforms have different requirements:
- LinkedIn: Square or close to square, at least 400×400 pixels
- Company Website: Usually rectangular, 800×1000 pixels works well
- Resume: Smaller file size, but still high quality
- Email Signature: Small file size, 200×200 pixels is fine

Common Mistakes to Avoid When Editing Headshots
Even with great AI tools, people make mistakes. Here’s what to avoid:
Over-Smoothing Your Skin: The biggest mistake! If your skin looks like plastic or porcelain, you’ve gone too far. Some texture is natural and professional.
Making Your Teeth Too White: Bright white teeth look fake. Slightly off-white is natural and better.
Choosing the Wrong Background: Busy backgrounds distract from your face. Keep it simple.
Over-Editing Your Features: Your headshot should look like you on your best day, not a different person. If your coworkers wouldn’t recognize you, dial it back.
Using Filters: Social media filters might be fun, but they have no place in professional headshots. Keep it natural.
Ignoring Lighting: Even AI can’t fix terrible lighting completely. Start with a decently lit photo.
Wrong File Format: Save your headshot as a JPEG (or JPG) for most uses. PNG works too but creates larger files.
Too Low Resolution: Your headshot should be at least 500 pixels wide. Smaller than that looks unprofessional.
Tips for Taking Photos That Work Best with AI
To get the best results from AI editing tools, start with a good base photo:
Lighting Tips:
- Face a window during the day (indirect sunlight is perfect)
- Avoid harsh overhead lights
- Don’t have a bright light directly behind you
- Cloudy days create beautiful, soft lighting
Positioning Tips:
- Hold the camera at eye level (not above or below)
- Stand about three feet from the camera
- Leave some space above your head in the frame
- Fill the frame with your head and shoulders
Expression Tips:
- Think of something that makes you genuinely happy for a real smile
- Keep your shoulders relaxed
- Stand up straight with confidence
- Practice a few times before taking the final photo
Background Tips:
- Choose a plain wall if possible
- Make sure nothing is sticking out behind your head
- Declutter the area around you
- Solid colors work better than patterns
Clothing Tips:
- Wear solid colors (they work better with AI)
- Choose colors that complement your skin tone
- Avoid busy patterns or logos
- Dress for the job you want
The Future of AI Headshots
AI technology for photo editing is advancing rapidly. Here’s what’s coming:
Even More Realistic: AI is getting better at making edits that are completely undetectable. Soon, you won’t be able to tell an AI-edited photo from one taken in a professional studio.
Virtual Try-On: Some new tools let you virtually “try on” different outfits, hairstyles, and backgrounds without actually changing anything in real life.
Real-Time Editing: Imagine taking a selfie and seeing it professionally edited in real-time on your screen. This technology is almost here.
Personalized Styles: AI will learn your preferences and automatically edit photos in your preferred style.
Better Accessibility: These tools will become even easier to use, making professional headshots accessible to everyone regardless of technical skills.


Frequently Asked Questions
Is it dishonest to use AI to edit my headshot?
Not at all! Think of it like wearing nice clothes to an interview or combing your hair before a photo. AI editing is just a digital version of presenting your best self. Just don’t change so much that you don’t look like yourself.
Will people be able to tell my headshot is AI-edited?
If you use the tools correctly and don’t over-edit, no one will notice. The key is natural-looking enhancements, not dramatic changes.
Can I use these AI headshots for official documents?
For IDs, passports, or legal documents, you should use unedited photos. But for LinkedIn, resumes, and professional profiles, AI-edited headshots are perfectly fine.
How often should I update my headshot?
Update your headshot every two to three years, or whenever your appearance changes significantly (new hairstyle, glasses, significant weight change, etc.).
Do I need a professional photographer anymore?
For most purposes like LinkedIn and job applications, AI-edited photos work great. However, for very high-profile positions, company executive pages, or important publications, a professional photographer is still worth it.
Which tool should I start with if I’ve never edited photos before?
Start with Canva or Fotor. Both have very user-friendly interfaces with automatic enhancements that work well for beginners.
Can I use AI to create a headshot if I don’t have any good photos?
Yes! Tools like ProfilePicture.AI and StudioShot can create professional headshots from casual selfies. You’ll need to upload several photos, but you don’t need professional photos to start.
Are free AI tools good enough?
Free tools like Pixlr and Canva’s free version are surprisingly powerful. For basic headshot editing, they’re often all you need. Premium tools offer more features and options, but they’re not necessary for everyone.
Real Success Stories
Sarah’s Career Change: Sarah was transitioning from retail to corporate marketing. She couldn’t afford a professional photographer but needed a polished LinkedIn photo. She used ProfilePicture.AI with her selfies and created a professional headshot that helped her land three interviews in her first week of job hunting.
Michael’s Freelance Business: Michael started a freelance consulting business but only had casual vacation photos of himself. Using PhotoRoom and Fotor, he created a professional headshot that he used on his website, LinkedIn, and business cards. He says his professional photo helped establish credibility with potential clients.
Elena’s Executive Profile: Elena was promoted to a director-level position and needed executive headshots for her company’s website. Using Luminar Neo, she transformed photos taken by a colleague into professional-looking headshots that matched the quality of other executives’ photos.
Final Thoughts: Your Headshot Is an Investment in Yourself
Your professional headshot isn’t just a photo—it’s an investment in your career. Whether you’re job hunting, building a business, or climbing the corporate ladder, a great headshot helps you make the right first impression.
The beauty of AI tools is that they’ve made professional-quality headshots accessible to everyone. You don’t need hundreds of dollars or a professional photographer. With the right tools and a little time, you can create a headshot that opens doors and opportunities.
Remember these key takeaways:
- Start with the best photo you can take (good lighting is crucial)
- Choose AI tools based on your specific needs and budget
- Edit conservatively—natural looks professional
- Test your headshot by asking friends for honest feedback
- Update regularly to keep your image current
Whether you choose Remini for enhancement, PhotoRoom for backgrounds, ProfilePicture.AI for generating new headshots, or a combination of tools, you now have the knowledge to create a professional headshot that represents you at your best.
Your perfect professional headshot is just a few clicks away. So grab your phone, find good lighting, take that photo, and let AI help you put your best face forward. Your future self will thank you when that dream job offer or important connection comes through!
Now stop reading and start creating—your professional image awaits!