Are you looking to start a website using WordPress but not sure how to install it on your HostGator hosting account? Installing WordPress can seem overwhelming, but with a comprehensive step-by-step tutorial, you’ll be up and running in no time.
WordPress is one of the most popular content management systems for creating websites. HostGator is a popular web hosting provider known for its user-friendly interface and reliable service. By combining the two, you can create a dynamic website for your business, blog, or online portfolio.
In this tutorial, we will walk you through the process of installing WordPress on HostGator. Whether you’re a beginner or have some experience with website development, this guide will simplify the installation process and help you get your website up and running quickly. Let’s dive in and get started with installing WordPress on HostGator.

Get Upto 70% on HostGator All Plans (2026)
How to Install WordPress on HostGator (A Comprehensive Guide)
Before diving into the installation process, it’s crucial to understand some fundamental concepts:
What is WordPress?
WordPress is an open-source CMS that powers millions of websites globally. It simplifies the process of creating and managing content, allowing users to build professional-looking websites without extensive coding knowledge.
Why Choose HostGator?
HostGator is a leading web hosting provider known for its excellent customer service, reliable servers, and user-friendly control panel. Their hosting plans cater to a wide range of needs, making them an ideal choice for beginners and experienced users alike.
Purchasing a HostGator Plan
To get started, you’ll need to sign up for a HostGator hosting plan. Follow these steps:
1) Visit HostGator’s Website
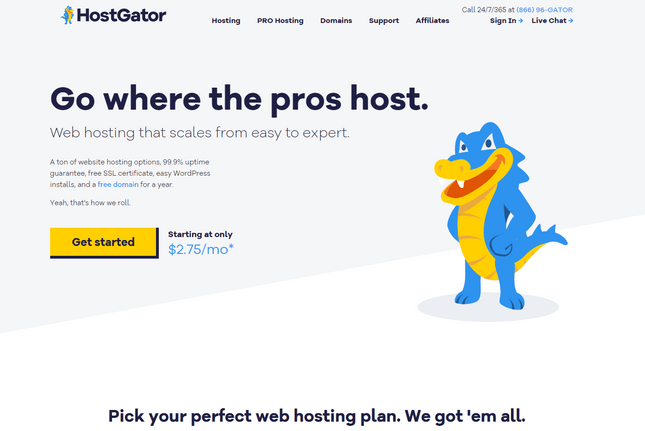
Navigate to the HostGator website and click on the “Get Started Now” button.
2) Choose a Hosting Plan
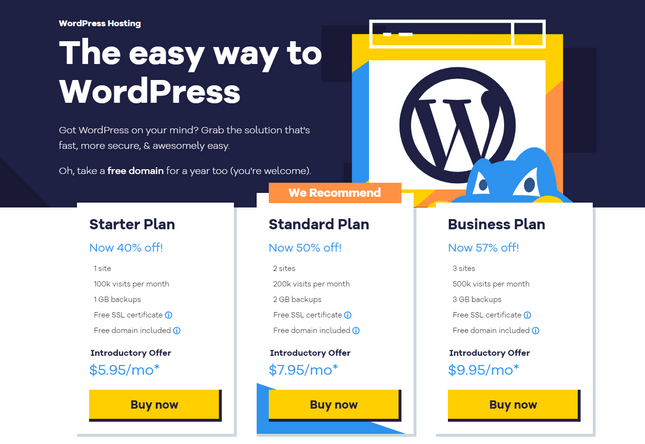
HostGator offers various hosting plans. Select the plan that best suits your needs, keeping factors like budget, website size, and expected traffic in mind.
3) Register a Domain Name
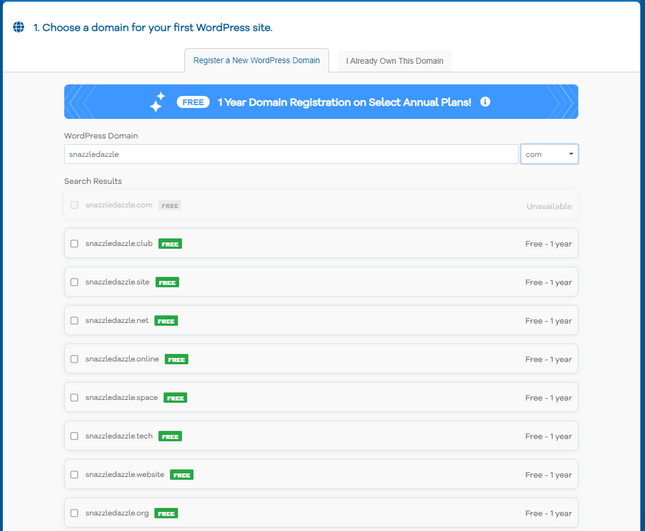
If you don’t have a domain name yet, you can register one through HostGator during the signup process. Alternatively, you can use an existing domain if you have one.
4) Complete the Signup Process

Fill in your account information, choose a hosting plan duration, and add any additional services you might need. Review your order and complete the payment process.


Accessing the HostGator Control Panel (cPanel)
After successfully signing up for a HostGator plan, you’ll gain access to the cPanel, which is the control panel for managing your hosting account.
Log in to the cPanel
Check your email for the login details, including your username and password. Once logged in, locate the “Your Control Panel” section and click on the link provided.
Installing WordPress with QuickInstall
HostGator simplifies the WordPress installation process by offering QuickInstall, a one-click installer within the cPanel.
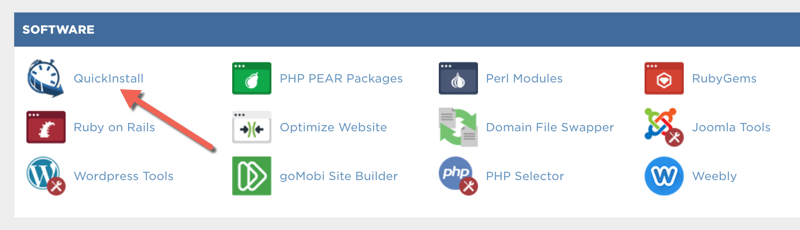
1) Find QuickInstall
Within the cPanel, locate the “Software” section, and click on the “QuickInstall” icon.
2) Select WordPress
In the QuickInstall dashboard, find and click on the “WordPress” icon under the “Popular Installs” section.
3) Begin the Installation
Click on the “Install WordPress” button to start the installation process.
4) Choose Your Domain
Select the domain where you want to install WordPress from the dropdown menu. If you have multiple domains, choose the one associated with the website you’re building.
5) Configure Settings
Fill in the required information, including the site name, site description, admin username, and admin email. Choose a strong password for your admin account.
6) Complete the Installation
Review your configuration settings, double-check the information you’ve entered, and click the “Install” button to initiate the installation.
7) Confirmation
Once the installation is complete, you’ll receive a confirmation message with your WordPress login details. Make sure to save this information for future reference.
Accessing Your WordPress Dashboard
Now that WordPress is installed, you can access your website’s admin dashboard to start customizing and creating content.
1) Visit Your Website
Open a new browser tab and enter your domain name in the address bar. You should see your WordPress website.
2) Log in to the WordPress Dashboard
To access the admin dashboard, add “/wp-admin” to the end of your domain (e.g., www.yourdomain.com/wp-admin). Enter the admin username and password provided during installation.

Exploring the WordPress Dashboard
Before diving into content creation, familiarize yourself with the WordPress dashboard’s key components.
1) Dashboard Overview
The dashboard provides an overview of your site, including recent activity, comments, and quick access to essential tools.
2) Menu Navigation
Explore the menu on the left side, where you’ll find options for posts, pages, media, appearance, plugins, and more. Take some time to navigate through these sections to understand their functionalities.
Customizing Your WordPress Site
Now that you’re acquainted with the basics, it’s time to customize your WordPress site to match your preferences and branding.
1) Choose a Theme

Navigate to “Appearance” and then “Themes” in the dashboard. Browse and choose a theme that suits your website’s purpose. You can install a new theme directly from the WordPress repository or upload a custom theme.
2) Customize the Site
Access the “Customize” option under “Appearance” to personalize your site further. Here, you can modify the site title, tagline, colors, fonts, and more.
3) Install Essential Plugins
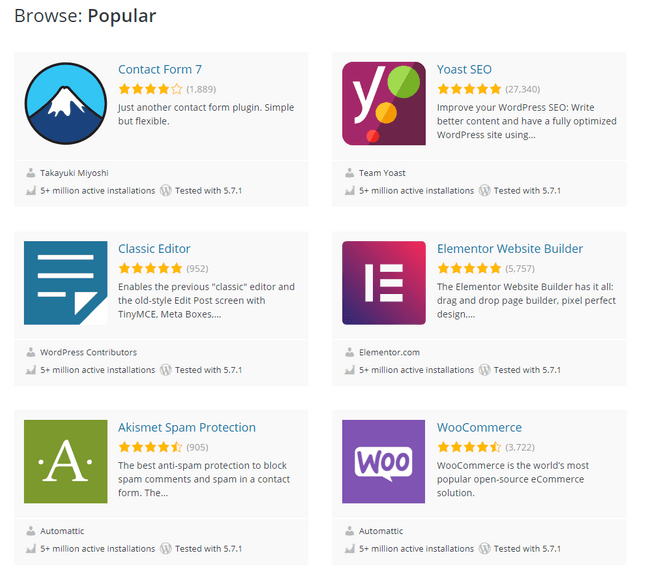
Visit the “Plugins” section to enhance your site’s functionality. Popular plugins include Yoast SEO for search engine optimization, Contact Form 7 for creating forms, and W3 Total Cache for performance optimization.
Adding Content to Your WordPress Site
Now that your site is customized, it’s time to add content.
1) Create Pages and Posts
Navigate to the “Pages” and “Posts” sections to add static pages (like Home, About, and Contact) and dynamic blog posts. Use the built-in editor to format text, add images, and embed media.
2) Media Library
Upload and manage images, videos, and other media files in the “Media” library. This centralizes your media assets for easy access when creating content.


Ensuring Website Security and Maintenance
To keep your WordPress site secure and running smoothly, implement these essential measures.
1) Update WordPress Regularly
Stay on top of updates to benefit from the latest features and security enhancements. You can update WordPress, themes, and plugins from the “Updates” section.
2) Backup Your Site
Regularly back up your website to prevent data loss. HostGator provides backup options, but you can also use plugins like UpdraftPlus for additional backup capabilities.
3) Install a Security Plugin
Enhance your site’s security by installing a reputable security plugin like Wordfence or Sucuri. These plugins help protect your site from malware, brute force attacks, and other security threats.
Ready to Get Start with Hostgator?
Start your online Journey with Hostgator to Get Upto 70% Off on All Hosting Plans
Final Words
How to Install WordPress on HostGator (Step-by-Step Guide for Beginners)
Setting up a website used to feel like assembling IKEA furniture without instructions. Today, it’s much simpler, especially with platforms like HostGator and WordPress working together.
In this guide, you’ll learn how to install WordPress on HostGator step by step. Whether you’re a beginner or someone who just wants a clean walkthrough, this article covers everything, without fluff, confusion, or tech jargon overload.
Why Choose HostGator for WordPress?
Before jumping into the installation, let’s address a simple question: why HostGator?
- Beginner-friendly dashboard
- One-click WordPress installation
- Reliable uptime and performance
- Affordable plans for starters
- Built-in tools for website management
If your goal is to launch quickly without technical headaches, HostGator is a practical choice.
What Do You Need Before Installing WordPress?
Keep these basics ready:
- A HostGator hosting account
- A registered domain name (you can buy it during signup)
- Login access to your hosting dashboard
That’s it. No coding degree required.
How to Install WordPress on HostGator Step by Step Guide
Let’s break this into clear steps.
Step 1: Log in to Your HostGator Account
Start by logging into your HostGator dashboard (also called the customer portal).
Once inside, go to your hosting section and look for:
- “cPanel”
- Or “Launch cPanel”
This is where most of the magic happens.
Step 2: Open the WordPress Installer
Inside cPanel, scroll down to find:
- Softaculous Apps Installer
- Or “QuickInstall” (depending on your hosting plan)
Click it.
Now select WordPress from the list.
Step 3: Choose Your Domain
You’ll now see installation settings.
Select:
- Your domain name
- Leave the directory field blank (unless you want WordPress on a subfolder)
Example:
yourwebsite.com→ installs on main domainyourwebsite.com/blog→ installs inside a blog folder
Step 4: Enter Site Details
Fill in the basics:
- Site Name
- Site Description
- Admin Username
- Admin Password
- Admin Email
Tip: Avoid using “admin” as your username. It’s the first thing hackers try.
Step 5: Install WordPress
Click the Install button.
Wait for a few seconds.
Boom, WordPress is now installed.
You’ll get two links:
- Your website URL
- Your admin login URL (
yourwebsite.com/wp-admin)
What Is HostGator One Click WordPress Install Guide?
This is exactly what you just did.
HostGator simplifies installation using tools like Softaculous. Instead of uploading files manually, you install WordPress in minutes.
That’s why beginners love it.
How to Setup WordPress on HostGator cPanel (After Installation)
Installing WordPress is just step one. Now let’s set it up properly.
Login to WordPress Dashboard
Visit:yourwebsite.com/wp-admin
Enter your login details.
Choose a Theme
Go to:
Appearance → Themes → Add New
Pick a theme that:
- Loads fast
- Matches your niche
- Looks clean on mobile
Avoid over-designed themes. Simplicity wins.
Install Essential Plugins
Start with these:
- SEO plugin (like Yoast or Rank Math)
- Security plugin
- Cache plugin for speed
- Backup plugin
Don’t install too many plugins. It slows your site.
Configure Basic Settings
Go to Settings → General
- Set site title
- Set timezone
- Adjust tagline
Then go to Settings → Permalinks
Choose:
Post Name
This helps SEO and readability.
How to Connect Domain to WordPress HostGator?
If you bought your domain separately, you’ll need to connect it.
Update Nameservers
In your domain registrar:
Replace nameservers with HostGator’s:
- ns1.hostgator.com
- ns2.hostgator.com
Wait for Propagation
It may take a few hours (sometimes up to 24 hours).
Once done, your domain points to your HostGator hosting.
How to Install WordPress Manually on HostGator?
Prefer doing it the “old-school” way? Here’s how.
Step 1: Download WordPress
Go to WordPress.org and download the latest version.
Step 2: Upload Files
- Open cPanel
- Go to File Manager
- Upload WordPress ZIP file to
public_html - Extract it
Step 3: Create a Database
In cPanel:
- Open MySQL Databases
- Create a new database
- Create a database user
- Assign user to database
Step 4: Configure wp-config File
Edit the wp-config.php file and add:
- Database name
- Username
- Password
Step 5: Run Installation
Visit your domain.
Follow on-screen instructions.
Done.
HostGator WordPress Installation Tutorial for Beginners
Let’s simplify everything into beginner language:
- Log in
- Click install
- Fill details
- Launch site
That’s it.
No need to overthink.
HostGator WordPress Setup for Beginners: Best Practices
Once your site is live, follow these tips:
Keep Your Site Secure
- Use strong passwords
- Enable SSL (HTTPS)
- Install a security plugin
Optimize for Speed
- Use lightweight themes
- Enable caching
- Compress images
Create Important Pages
Start with:
- Home
- About
- Contact
- Privacy Policy
Focus on Content
A website without content is like a shop without products.
Publish helpful, clear, and original content.
How to Install WordPress Without cPanel on HostGator?
Some plans use a custom dashboard instead of cPanel.
In that case:
- Log into your HostGator account
- Go to “Websites”
- Click “Create Site”
- Select WordPress
- Follow prompts
Same result, fewer steps.
Common WordPress Installation Errors on HostGator (and Fixes)
Even simple setups can hit bumps. Here are common issues:
Error 1: Database Connection Error
Cause: Wrong database credentials
Fix: Double-check wp-config.php
Error 2: White Screen
Cause: Plugin or theme conflict
Fix: Disable plugins via File Manager
Error 3: 404 Error After Install
Cause: Permalink settings
Fix: Go to Permalinks and click “Save”
Error 4: Site Not Loading
Cause: DNS not propagated
Fix: Wait a few hours
How Long Does It Take to Install WordPress on HostGator?
- One-click install: 2–5 minutes
- Manual install: 15–20 minutes
Most of your time goes into setup, not installation.
Is HostGator Good for WordPress Beginners?
Yes, especially if you want:
- Easy setup
- Low cost
- Reliable hosting
It removes technical barriers and lets you focus on building your site.
Frequently Asked Questions
How do I install WordPress on HostGator step by step?
To install WordPress on HostGator, log in to your hosting account, open cPanel, launch Softaculous or QuickInstall, select WordPress, enter your site details, and click install. The process usually takes a few minutes.
Does HostGator offer one-click WordPress installation?
Yes, HostGator provides one-click WordPress installation through tools like Softaculous or QuickInstall, making it easy for beginners to set up a website without coding.
Can I install WordPress on HostGator without cPanel?
Yes, some HostGator plans offer a custom dashboard where you can install WordPress by selecting “Create Site” and following the setup steps without using cPanel.
How long does it take to install WordPress on HostGator?
A one-click WordPress installation on HostGator usually takes 2 to 5 minutes, while manual installation may take around 15–20 minutes.
How do I connect my domain to WordPress on HostGator?
To connect your domain, update your domain’s nameservers to HostGator’s (ns1.hostgator.com and ns2.hostgator.com). After propagation, your domain will point to your WordPress site.
What is the easiest way to set up WordPress on HostGator for beginners?
The easiest way is to use the one-click installer in cPanel. It requires minimal setup and automatically configures your WordPress site.
Why is my WordPress site not working after installation on HostGator?
Common reasons include incorrect database settings, DNS propagation delays, or plugin conflicts. Checking configuration files and waiting for DNS updates usually resolves the issue.
Do I need technical skills to install WordPress on HostGator?
No, you don’t need technical skills. HostGator’s one-click installation simplifies the process so beginners can set up WordPress easily.
Can I install WordPress manually on HostGator?
Yes, you can install WordPress manually by uploading files, creating a database, and configuring the wp-config file through cPanel.
Is HostGator good for WordPress beginners?
HostGator is beginner-friendly due to its simple interface, one-click installation, and affordable hosting plans, making it a good option for new users.
Final Thoughts
Installing WordPress on HostGator is not complicated. In fact, it’s one of the easiest ways to launch a website today.
You don’t need coding skills. You don’t need expensive tools. You just need a clear process, and now you have one.
Start simple. Build gradually. Improve consistently.
That’s how real websites grow.