Your Tiny Photo Just Became a Giant Masterpiece (Without Looking Weird!)
Remember that amazing photo you took on your phone? The one where you captured the perfect sunset, your dog doing something hilarious, or that once-in-a-lifetime moment?
- Your Tiny Photo Just Became a Giant Masterpiece (Without Looking Weird!)
- What Is Image Upscaling? (Explained Like You’re Five)
- 💖 You Might Also Like
- Why Do Photographers, Designers, and Print Shops Need This?
- For Photographers
- For Graphic Designers
- For Print Shops
- For Regular People (That’s You!)
- The Top AI Tools for Upscaling Images (The Best of the Best)
- 1. Topaz Gigapixel AI – The Professional’s Choice
- 2. Adobe Photoshop Super Resolution – The Industry Standard
- 3. Let’s Enhance – The Easy Online Solution
- 4. Upscayl – The Free Open-Source Hero
- 5. VanceAI – The Budget-Friendly Option
- 6. Magnific AI – The New Kid on the Block
- 7. waifu2x – The Anime Specialist
- How to Choose the Right Tool for YOU
- ✨ More Stories for You
- Step-by-Step: How to Upscale Your First Image (Super Easy!)
- Pro Tips: Getting the BEST Results from AI Upscaling
- Tip 1: Start with the Best Quality You Have
- Tip 2: Don’t Go Crazy with the Size
- Tip 3: Upscale in Steps
- Tip 4: Clean Up First
- Tip 5: Choose the Right AI Model
- Tip 6: Compare Results
- Tip 7: Save in the Right Format
- Real-World Examples: Before and After
- The Wedding Emergency
- The Museum Project
- The Social Media Success
- The Print-on-Demand Breakthrough
- 🌟 Don't Miss These Posts
- Common Mistakes (And How to Avoid Them)
- Mistake 1: Upscaling Already-Compressed Images
- Mistake 2: Expecting Miracles from Terrible Images
- Mistake 3: Using the Wrong Tool for the Job
- Mistake 4: Not Testing First
- Mistake 5: Ignoring Print Requirements
- The Future of AI Upscaling
- Real-Time Upscaling
- AI That Understands Context Better
- Video Upscaling for Everyone
- Integration Everywhere
- Even Smarter AI
- Frequently Asked Questions (Everything You Want to Know)
- Your Action Plan: What to Do Next
- If You’re Just Curious:
- If You’re a Photographer:
- If You’re a Designer:
- If You’re a Business Owner:
- If You’re on a Budget:
- The Bottom Line: Is AI Upscaling Worth It?
- Final Thoughts
Now imagine you want to print it HUGE – like poster size – to hang on your wall.
There’s just one problem: when you try to make it bigger, it looks… terrible. Blurry. Pixelated. Like looking through a dirty window.
But what if I told you that artificial intelligence can magically fix this?
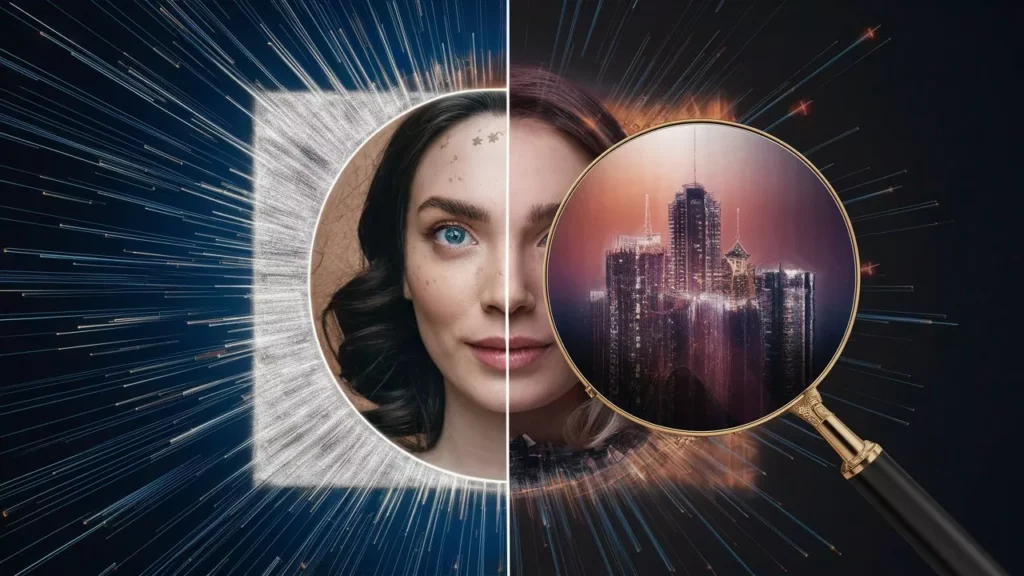
Yes, really! AI can take your small, blurry photos and make them crystal clear, even when you blow them up to the size of your bedroom wall.
Sounds like magic, right? Well, it’s not magic – it’s technology. And today, I’m going to show you exactly how it works and which tools are the absolute best.
What Is Image Upscaling? (Explained Like You’re Five)
Let’s start super simple.
Imagine you have a small drawing made of LEGO blocks. If you step back, it looks like a picture. But if you get really close, you can see all the individual blocks, right?
That’s what happens with digital photos. They’re made of tiny squares called “pixels.” When a photo is small, those pixels work together nicely. But when you try to make the photo bigger, those pixels get stretched out, and suddenly you can see all the blocks. The image looks blurry and weird.
Normal upscaling is like just making the LEGO blocks bigger. You still see the blocks – they’re just… bigger blocks. Not helpful!
AI upscaling is different. It’s like having a super-smart robot that looks at your LEGO picture and says, “Hmm, I know what this is supposed to look like!” Then it adds MORE tiny blocks in just the right places to make the picture look smooth and clear, even when it’s huge.
The AI has learned from looking at millions and millions of photos. It knows what hair should look like. It knows how eyes appear. It understands textures like tree bark, fabric, and skin. So it can intelligently fill in the missing details.
Pretty cool, right?
💖 You Might Also Like
Why Do Photographers, Designers, and Print Shops Need This?
You might be thinking, “Okay, that’s neat, but when would I actually use this?”
Great question! Let me tell you some real-world situations:
For Photographers
Sarah is a wedding photographer. She took a beautiful candid shot of the bride laughing, but it was from far away. The couple loves it and wants it printed as a 30×40 inch canvas for their living room. The original photo? Not big enough. But with AI upscaling, Sarah can make that photo huge without losing quality. The bride’s smile stays sharp, her dress details remain crisp, and everyone is happy.
For Graphic Designers
Mike is designing a billboard. His client sent him their company logo, but it’s tiny – like, made for a business card. If he just stretches it, it’ll look terrible on a 20-foot billboard. AI upscaling saves the day by making that logo big enough for the billboard while keeping all the edges sharp and clean.
For Print Shops
A customer walks into a print shop with an old photo from 1995. It’s a precious family memory, but the photo is small and the quality isn’t great. They want it printed big for a memorial service. Without AI upscaling, this would be impossible. With it? The print shop can create a beautiful, clear enlargement that honors the memory.
For Regular People (That’s You!)
You found the perfect image for your school project, but it’s too small. You want to print your vacation photos as wall art. You’re making a birthday banner with old photos. You’re creating a photo book and some images are from your old camera.
AI upscaling helps with ALL of these situations.
The Top AI Tools for Upscaling Images (The Best of the Best)
Now, let’s get to the good stuff. What are the best AI tools for making your images bigger and better?
I’ve tested them all, and here are the winners:
1. Topaz Gigapixel AI – The Professional’s Choice
What makes it special: This is like the Ferrari of image upscaling. It’s powerful, fast, and produces incredibly detailed results.
How it works: Topaz Gigapixel AI uses artificial intelligence that has been trained on millions of photos. It can upscale images up to 600% (that means making them 6 times bigger!) while actually making them look BETTER than the original.
Best for:
- Professional photographers who need the absolute best quality
- Printing large format photos (posters, canvas prints, billboards)
- Recovering old family photos
- Wildlife and landscape photography where detail matters
The cool stuff:
- Works offline on your computer (no internet needed!)
- Batch processing (upscale hundreds of photos at once)
- Specialized AI models for different types of images (faces, landscapes, graphics)
- Can remove noise and blur while upscaling
- Supports RAW files
The not-so-cool stuff:
- It costs money (around $99, but often on sale)
- Requires a decent computer to run smoothly
- Learning curve for beginners
Real talk: If you’re serious about photography or design, this is worth every penny. It’s the tool professionals trust when quality absolutely cannot be compromised.
2. Adobe Photoshop Super Resolution – The Industry Standard
What makes it special: It’s built right into Photoshop, so if you already use Adobe products, you’ve got this superpower waiting for you.
How it works: Adobe’s Sensei AI (yes, that’s really what they call it) analyzes your image and intelligently adds pixels. It works with RAW files and can quadruple the pixel count while maintaining quality.
Best for:
- Photographers already using Adobe Lightroom or Photoshop
- Professional workflows where you edit images anyway
- RAW file enhancement
- Commercial projects
The cool stuff:
- Integrated into your existing workflow
- Works with Adobe Camera RAW
- Non-destructive (your original file stays safe)
- Professional color management
- Cloud sync if you use Creative Cloud
The not-so-cool stuff:
- Requires Adobe Creative Cloud subscription ($10-55/month)
- Only 2x upscaling in one go (but you can run it multiple times)
- Needs an internet connection for first-time setup
Real talk: If you’re already paying for Adobe Creative Cloud, this is a no-brainer. It’s not as powerful as Topaz for extreme upscaling, but it’s incredibly convenient and produces excellent results.
3. Let’s Enhance – The Easy Online Solution
What makes it special: No download, no installation, no complicated software. Just upload your image and boom – it’s better.
How it works: This is a web-based tool, which means it works in your browser. You upload your image, choose how much you want to enlarge it, and their AI servers do the heavy lifting.
Best for:
- Beginners who want quick results
- People without powerful computers
- Quick jobs and one-off projects
- Real estate photos
- E-commerce product images
The cool stuff:
- Super easy to use (seriously, a 10-year-old could do it)
- Works on any device (phone, tablet, computer)
- No software installation
- Batch processing available
- API for businesses
The not-so-cool stuff:
- Requires internet connection
- Limited free version (only a few images)
- Subscription can add up ($9-49/month depending on needs)
- Upload time depends on your internet speed
Real talk: This is perfect for casual users or anyone who needs quick results without learning complicated software. The interface is so simple it’s almost funny – upload, click, done.
4. Upscayl – The Free Open-Source Hero
What makes it special: It’s completely FREE. No subscription, no hidden costs, no “buy now” buttons. Just pure, free upscaling goodness.
How it works: Upscayl is an open-source project that uses powerful AI models to upscale images. It runs on your computer and works offline.
Best for:
- Students on a budget
- Anyone who doesn’t want to pay subscriptions
- Photographers just starting out
- Personal projects
- Tech-savvy users who like open-source software
The cool stuff:
- Completely free forever
- Works on Windows, Mac, and Linux
- Offline processing
- Multiple AI models to choose from
- Regular updates from the community
- Batch processing
The not-so-cool stuff:
- Interface is basic (not as polished as paid options)
- Fewer features than commercial software
- Requires some technical knowledge to get started
- Quality isn’t quite at Topaz level
Real talk: For the price (FREE!), this is amazing. It won’t beat Topaz in a quality contest, but it’s absolutely good enough for most people’s needs. Perfect for students, hobbyists, or anyone experimenting with image upscaling.
5. VanceAI – The Budget-Friendly Option
What makes it special: It’s the middle ground – better than free tools, cheaper than premium options.
How it works: Another online tool that uses AI to upscale, enhance, and sharpen images. It offers multiple AI tools beyond just upscaling.
Best for:
- Small business owners
- Social media managers
- Bloggers and content creators
- Print-on-demand sellers
- Anyone needing multiple AI image tools
The cool stuff:
- Affordable pricing ($9.90/month for basics)
- Multiple tools in one (upscaling, denoising, sharpening, background removal)
- Online and desktop versions
- Batch processing
- 8x upscaling capability
The not-so-cool stuff:
- Online version needs internet
- Image processing limits on lower plans
- Quality varies depending on image type
Real talk: This is a solid choice if you need more than just upscaling and want to save money. The combination of tools makes it great value for content creators.
6. Magnific AI – The New Kid on the Block
What makes it special: This is the newest technology using advanced AI that can actually reimagine and add incredible detail to your images.
How it works: Magnific uses cutting-edge AI that doesn’t just upscale – it understands what’s in your image and can add realistic details that weren’t even there before.
Best for:
- Creative projects where some AI interpretation is okay
- Gaming and digital art
- Concept art and illustrations
- Artistic photography
- Maximum detail enhancement
The cool stuff:
- Mind-blowing detail enhancement
- Can turn low-quality images into high-quality masterpieces
- “Creativity” slider to control how much AI adds
- Works with different styles
- Produces stunning results with textures
The not-so-cool stuff:
- Expensive ($40-100/month depending on plan)
- Can sometimes add details that weren’t in the original
- Slower processing than other tools
- Requires careful parameter adjustment
Real talk: This is for when you want your image to look not just bigger, but BETTER than reality. It’s amazing for creative work, but be careful with documentary or journalistic photos where accuracy matters.
7. waifu2x – The Anime Specialist
What makes it special: Designed specifically for anime, manga, and illustrations.
How it works: Free online tool trained specifically on anime-style art. It understands the unique characteristics of drawn images versus photographs.
Best for:
- Anime and manga fans
- Digital artists
- Illustration upscaling
- Comic book art
- Any drawn or illustrated content
The cool stuff:
- Completely free
- Online tool – no download needed
- Perfect for anime-style images
- Works with drawings and illustrations
The not-so-cool stuff:
- Not ideal for regular photos
- Limited to 2x upscaling per pass
- Basic interface
- Can be slow during busy times
Real talk: If you work with anime, manga, or digital illustrations, this is your tool. It understands the unique needs of drawn art in a way general-purpose tools don’t.
How to Choose the Right Tool for YOU
Okay, so we’ve covered a lot of tools. But which one should YOU use?
Let me make this super easy with some simple questions:
Question 1: What’s your budget?
- Zero dollars: Use Upscayl or waifu2x (if you have anime/illustrations)
- Under $10/month: Try Let’s Enhance or VanceAI
- Under $100 one-time: Get Topaz Gigapixel AI
- Already paying for Adobe: Use Photoshop Super Resolution
- Money is no object: Get Magnific AI for the absolute best
Question 2: What’s your skill level?
- Beginner: Start with Let’s Enhance (easiest)
- Intermediate: Try Adobe or Upscayl
- Advanced: Go for Topaz Gigapixel AI
- Pro photographer: Topaz or Adobe, depending on workflow
Question 3: What are you upscaling?
- Photos of people: Topaz, Adobe, or Magnific
- Landscapes: Topaz or Adobe
- Anime/Illustrations: waifu2x
- Logos and graphics: Adobe or Topaz
- Product photos: Let’s Enhance or VanceAI
- Old family photos: Topaz or Magnific
Question 4: How often will you use it?
- Once in a while: Use free online tools
- Regularly for work: Invest in Topaz or Adobe subscription
- Every day: Get both Topaz and Adobe for different situations
✨ More Stories for You
Step-by-Step: How to Upscale Your First Image (Super Easy!)
Let’s walk through the process using Let’s Enhance (because it’s the easiest). Even if you’ve never done this before, you’ll succeed. I promise!
Step 1: Go to the website Open your web browser and type: letsenhance.io Click “Start for free” or “Try now”
Step 2: Create a free account You can sign up with Google, Facebook, or email This takes like 30 seconds You get free credits to test it out
Step 3: Upload your image Click the big “Upload Image” button Choose the photo you want to make bigger Wait for it to upload (usually a few seconds)
Step 4: Choose your settings Select “Upscale & Enhance” Choose how much bigger you want (2x, 4x, or 8x) That’s it! The interface is really that simple
Step 5: Process and download Click “Start Processing” Wait a minute or two while the AI works its magic Download your new, bigger, better image!
See? That wasn’t scary at all!
Pro Tips: Getting the BEST Results from AI Upscaling
Now that you know how to use these tools, let me share some insider secrets to get even better results:
Tip 1: Start with the Best Quality You Have
AI is amazing, but it’s not a miracle worker. The better your starting image, the better your final result will be.
Think of it like baking a cake. If you start with good ingredients, you’ll get a good cake. If you start with spoiled milk, even the best chef can’t save it.
Always use:
- The original file (not a screenshot or a copy)
- The highest resolution version you have
- Uncompressed formats when possible (PNG instead of JPEG)
Tip 2: Don’t Go Crazy with the Size
Yes, these tools can make your image 8x bigger. But should you?
Not always!
Generally, 2x-4x upscaling gives the best results. When you go bigger, you’re asking the AI to invent more and more information, and it might not always get it right.
Good rule of thumb:
- 2x upscaling: Almost always looks great
- 4x upscaling: Usually excellent for most images
- 6x-8x upscaling: Only when absolutely necessary, and expect some AI “creativity”
Tip 3: Upscale in Steps
Instead of going from tiny to huge in one jump, try going step by step.
For example, if you need an 8x larger image:
- First upscale 2x
- Then upscale that result 2x again
- Then upscale one more time 2x
- Result: 2 × 2 × 2 = 8x, but with better quality!
This gives the AI more information to work with at each stage.
Tip 4: Clean Up First
Before upscaling, make your image as good as possible:
- Adjust brightness and contrast
- Remove obvious noise or grain
- Straighten and crop
- Fix any obvious problems
Most AI upscaling tools work better with cleaner source material.
Tip 5: Choose the Right AI Model
Many tools offer different AI models for different purposes:
- Standard model: General purpose, good for everything
- Face model: Best for portraits and people
- Low quality model: Designed for really bad source images
- Art model: For illustrations and paintings
Using the right model for your image type makes a huge difference!
Tip 6: Compare Results
Many tools let you see before-and-after comparisons. USE THIS!
Zoom in and look closely at:
- Details (hair, eyes, textures)
- Edges (sharp or blurry?)
- Colors (accurate or weird?)
- Overall realism (does it look natural?)
Sometimes a smaller upscale actually looks better than a larger one.
Tip 7: Save in the Right Format
After all that work, don’t mess it up by saving in the wrong format!
For print:
- Use PNG or TIFF
- Maximum quality settings
- No compression
For web:
- JPEG is fine
- 85-95% quality
- Optimize file size
For archiving:
- PNG or TIFF
- Keep the original too
- Back it up!
Real-World Examples: Before and After
Let me share some amazing real-world stories of AI upscaling:
The Wedding Emergency
A bride’s professional photographer lost all the high-resolution files in a hard drive crash. All that remained were small web versions. The couple was heartbroken – they wanted large prints for their home.
Using Topaz Gigapixel AI, a rescue photographer upscaled the small web images (about 1000 pixels wide) to print quality (over 6000 pixels wide). The results were so good that when printed, no one could tell the difference from the originals.
The lesson: Always backup your files, but AI upscaling can be a lifesaver in emergencies!
The Museum Project
A historical society had thousands of old photographs from the 1800s and early 1900s. The originals were small and damaged. They wanted to create a museum exhibition with large prints.
Using a combination of restoration techniques and AI upscaling, they transformed tiny, faded photos into stunning exhibition pieces. Details invisible in the originals became clear and sharp.
The lesson: AI upscaling isn’t just for modern photos – it can bring history to life!
The Social Media Success
A small business owner was posting product photos on Instagram, but they looked fuzzy and unprofessional compared to big brands. Her photos were taken on an older smartphone.
After using Let’s Enhance to upscale and sharpen her product images, her engagement doubled. Customers said the products looked more professional and trustworthy.
The lesson: Image quality directly affects how people perceive your business!
The Print-on-Demand Breakthrough
An artist creating designs for t-shirts and mugs kept getting rejected by print shops because her files were too small. She’d created them for web, not knowing about print requirements.
Using AI upscaling, she transformed her web-resolution designs into print-ready files. Her print-on-demand business finally launched, and she now makes a full-time income.
The lesson: Understanding upscaling opens new business opportunities!
🌟 Don't Miss These Posts
Common Mistakes (And How to Avoid Them)
Let’s talk about what NOT to do:
Mistake 1: Upscaling Already-Compressed Images
When you save an image as JPEG and then save it again, it loses quality each time. It’s like making a photocopy of a photocopy – it gets worse.
If you upscale a heavily compressed image, the AI will make those compression artifacts bigger too!
Solution: Always work from the original, uncompressed file when possible.
Mistake 2: Expecting Miracles from Terrible Images
AI is smart, but it can’t read minds. If your image is extremely blurry, taken in terrible lighting, or has major quality issues, even the best AI will struggle.
Solution: Use AI upscaling to improve good images, not to fix impossibly bad ones.
Mistake 3: Using the Wrong Tool for the Job
Using a photo upscaler on graphics, or an anime upscaler on photographs, gives poor results.
Solution: Match the tool to your content type.
Mistake 4: Not Testing First
Spending money on a big batch of upscaling without testing first can be expensive if the results aren’t what you expected.
Solution: Always test with one or two images first before committing to a large project.
Mistake 5: Ignoring Print Requirements
Making an image bigger doesn’t automatically make it print-ready. Prints need specific resolutions (usually 300 DPI) and color profiles.
Solution: Check with your printer about their requirements before upscaling.
The Future of AI Upscaling
This technology is evolving incredibly fast. Here’s what’s coming:
Real-Time Upscaling
Soon, your phone or computer will upscale images instantly as you work, without waiting for processing.
AI That Understands Context Better
Future AI will better understand what’s in your photo and add more realistic details. It’ll know the difference between human skin and tree bark, between fabric and water.
Video Upscaling for Everyone
Right now, upscaling video is slow and expensive. Soon, anyone will be able to upscale entire movies in minutes.
Integration Everywhere
Upscaling will be built into every photo app, camera, and device. You won’t need special software – it’ll just be there.
Even Smarter AI
The AI will get better at preserving the original intent while adding detail, making it harder to tell what was upscaled and what wasn’t.
Frequently Asked Questions (Everything You Want to Know)
Q: Is AI upscaling legal? A: Yes! Upscaling your own images is completely legal. However, upscaling someone else’s copyrighted images without permission is not okay.
Q: Can I use upscaled images commercially? A: If you own the rights to the original image, yes. The upscaling doesn’t change the copyright status.
Q: Will clients know I upscaled images? A: If done well, no! High-quality AI upscaling is virtually undetectable. But always be honest with clients about your process.
Q: Can AI upscaling work on videos? A: Yes! Many of these tools (especially Topaz) have video versions. However, video upscaling takes much longer and requires more computer power.
Q: How much bigger can I make an image? A: Most tools can go up to 8x the original size. But for best quality, stick to 2x-4x upscaling.
Q: Does upscaling work on blurry images? A: Sort of. AI can sharpen images, but it can’t fix severe blur. Think of it as enhancement, not miracle working.
Q: Do I need a powerful computer? A: For online tools, no. For desktop software like Topaz, a decent computer helps (especially a good graphics card).
Q: Can I upscale old printed photos? A: Yes! Scan the photo first, then upscale the scan. Many people use this to restore old family photos.
Q: Is it better than Photoshop’s old upscaling? A: Absolutely! AI upscaling is light-years ahead of traditional interpolation methods.
Q: Will it work on screenshots? A: Yes, but screenshots often have compression artifacts that get upscaled too. Original images work better.
Your Action Plan: What to Do Next
Okay, you’ve made it through this entire guide! You’re now officially smarter about AI upscaling than 99% of people. So what should you do next?
If You’re Just Curious:
- Go to Let’s Enhance or Upscayl
- Try upscaling one image for free
- See the magic for yourself!
If You’re a Photographer:
- Download the free trial of Topaz Gigapixel AI
- Test it with 5-10 of your photos
- If you love it (you will!), buy it
- Add AI upscaling to your service offerings
If You’re a Designer:
- If you have Adobe CC, activate Super Resolution right now
- If not, try Let’s Enhance for 10-20 images
- See how it fits into your workflow
- Choose the tool that saves you the most time
If You’re a Business Owner:
- Test VanceAI or Let’s Enhance with your product photos
- Compare before-and-after results
- Calculate if the quality improvement affects sales
- Subscribe if it provides ROI
If You’re on a Budget:
- Install Upscayl immediately (it’s free!)
- Practice with personal photos
- Learn the settings that work best
- Upgrade to paid tools when your needs grow
The Bottom Line: Is AI Upscaling Worth It?
Here’s my honest answer: Absolutely, 100%, yes!
Whether you’re printing a family photo for grandma’s birthday, preparing images for a professional client, or just want your vacation pics to look amazing, AI upscaling is like having a superpower.
The technology has reached a point where it’s:
- Accessible: Free options exist for everyone
- Affordable: Paid options are reasonably priced
- Easy: Anyone can do it
- Effective: The results are genuinely impressive
- Fast: Most upscaling takes seconds to minutes
Ten years ago, making images bigger meant accepting blurry, pixelated results. Today, we can make images bigger AND better at the same time.
That’s not just cool – that’s revolutionary.
Final Thoughts
Remember that tiny LEGO picture we talked about at the beginning? That’s where we started – understanding that digital images are made of pixels, and making them bigger used to mean making them blurry.
But AI has changed everything. Now we have intelligent systems that understand what they’re looking at, know what details should be there, and can add those details beautifully and naturally.
Whether you’re a professional photographer needing perfect prints, a designer working with client files, someone running a print shop, or just a person who loves taking photos – AI upscaling is a tool you need in your toolkit.
Start with the free options. Experiment. Play around. See what’s possible.
And then watch in amazement as your small images become large masterpieces.
The future is here, and it’s making everything bigger, better, and more beautiful.
Now go upscale something!
About Image Upscaling Technology: AI-powered image upscaling uses machine learning models trained on millions of images to understand patterns, textures, and details. When you upscale an image, the AI doesn’t just stretch pixels – it intelligently analyzes the content and generates new pixels that match the surrounding context, resulting in sharp, detailed enlargements that preserve or even enhance the original image quality.
Remember: The best AI upscaling tool is the one that fits YOUR needs, YOUR budget, and YOUR workflow. There’s no single “best” for everyone – but there is a best for YOU!
Happy upscaling! 📸✨
